GROUPS
Research
This is the research section of my Exam for GCSE Photography.
All of the photographs here, until mentioned, are research for my chosen project Groups. The images in here are all from the internet, and I plan in the near future to take some images of my own and mimic those in my research. The main reason that I chose images like this simply because I really like them, and I think that these images will really help me to do things the way I want to do them.
The Groups category in photography is surprisingly good. You can use the group category in anything. The first thought that came into my mind was that I could incorporate the Product Photography into this. If you think about it, you can use items from this project such as pens, pencils, paints, cans of food, cans of deodorant, literally almost anything. Using items like this in group photography, in my opinion, will really boost my grade up (hopefully!).
The group section in photography is really good, and I chose this project for a number of reasons. the main reason is that I think it will be relatively easy. The other reason as to why I chose this project is that you can use literally anything. This means I could use humans, animals, objects and other things. I am planning to use loads of items and using an infinity curve.


This is a Mind-Map of some ideas i can use to help me progress in my Photography exam. I think that I could go outside to do my Group photography, and the key destination I would go to in order to do this would most probably be Liverpool City Centre. Every single day, thousands of people from all around the world and people from Liverpool come together in what ends up being hoards of shoppers and tourists. Nonetheless, there are other places I can go to take the images, and one of them is as simple as my home! I can use plain white paper stuck to the wall and a bright light. This will create an infinity curve, and I can use items like toy cars, paints and pencils and other things along these lines. This Mind-Map gives me promise for what I hope to achieve.
4x4 Imagery using Photoshop
This 4x4 imagery is something which I liked to do. I enjoyed exploring the different tools in Adobe Photoshop and looking at what made this particular image look good. The first image is the original photograph. On the second image from the left, I added more contrast to the image and made it a little bit brighter, as well as adding a photo filter and giving it a slight sepia tone to. On the third image, I made it monochrome; purely black and white. Finally, on the fourth image, I used spot colour, and added in the bags and some coats of the pupils in my school. This is a slight exploration of the techniques I know how to use in Adobe Photoshop, and the 4x4 imagery is a perfect example of how these techniques can be used effectively. In my opinion, I think that the second and fourth image are the most successful images. I just think that the use of the photo filter on the second image, and the use of spot colour in the fourth image make them look really good, and in my eyes they are by far the best of a good bunch of images. All four of the images are below.


Unedited Images
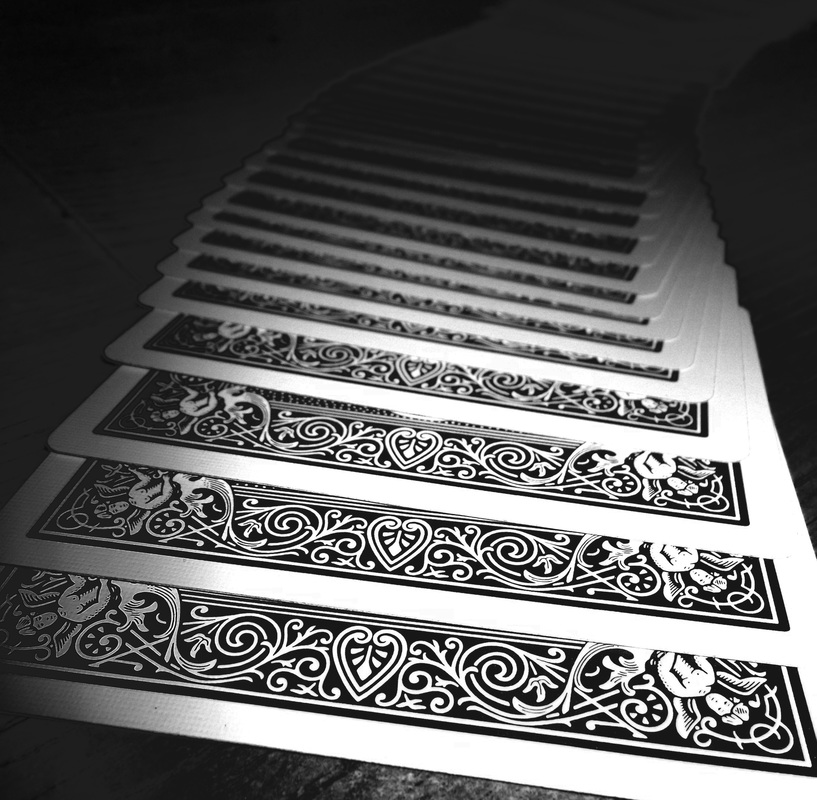
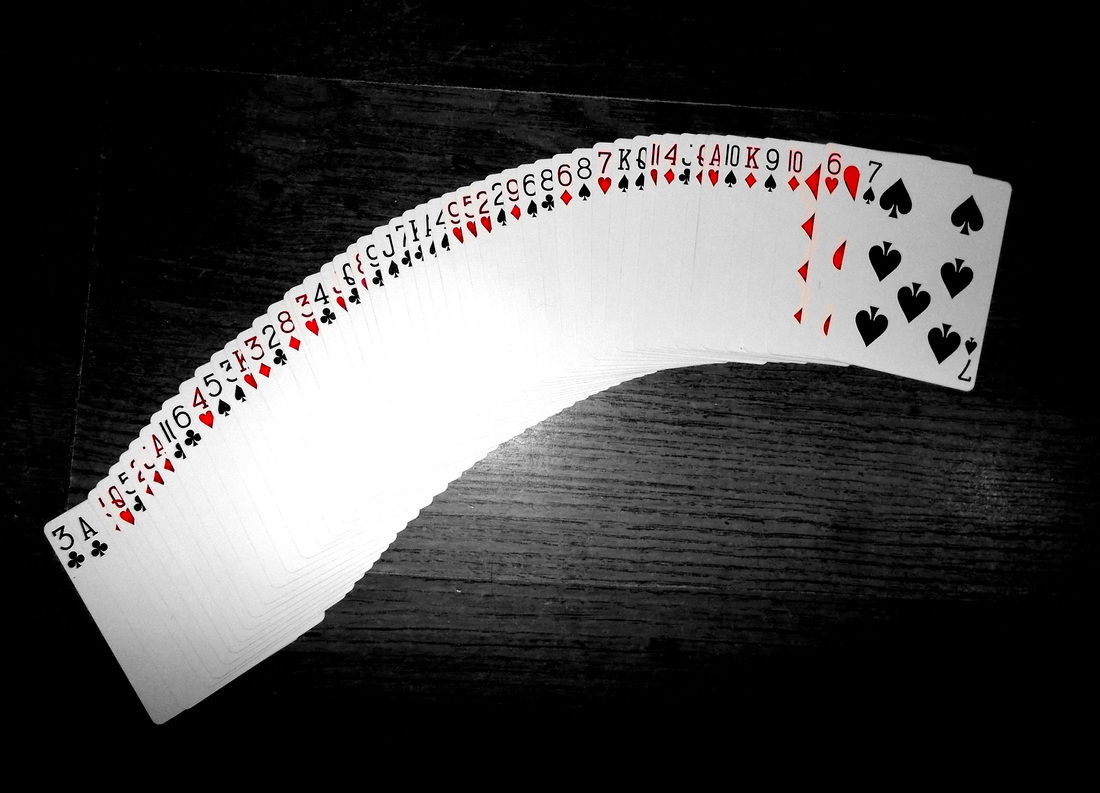
The images in this section of my exam website page are all unedited and fresh from my SD card. I haven't even considered opening them in Photoshop, and I think that in doing this, other people can see my images and decide what ones they like and think I could manipulate in Photoshop to look better and better. I will admit, the images in this section are extremely repetitive, however I needed to ensure I produced a lot of photographs which looked the same. This was so I could choose the perfect one in the end. The images in this section were taken in my school, at around 11:00am. At this time in the school day, it is break time. This is when groups of friends and teachers crowd together, speak, and can just genuinely have a laugh and joke for around 15 minutes. I stood on the top balcony in my school, and this was so I could get a decent overview of the students in the area at the time. Some of the images in this section are of a deck of cards tnhat i have at home, and I simply used them and spread them out to take some good images.


Timed Examination Work
The images in this section of my exam page have all been explored and modified in Adobe Photoshop. These images have all been photoshopped during the time that I have had in my exam; 10 hours. Some images are most definitely better than others, but in my eyes, they are all really aesthetically pleasing. I used a plethora of different photoshop techniques, and in my personal opinion, they are all good. I hope that the images I have edited in photoshop are as pleasing for you to look at as they have been for me!

|
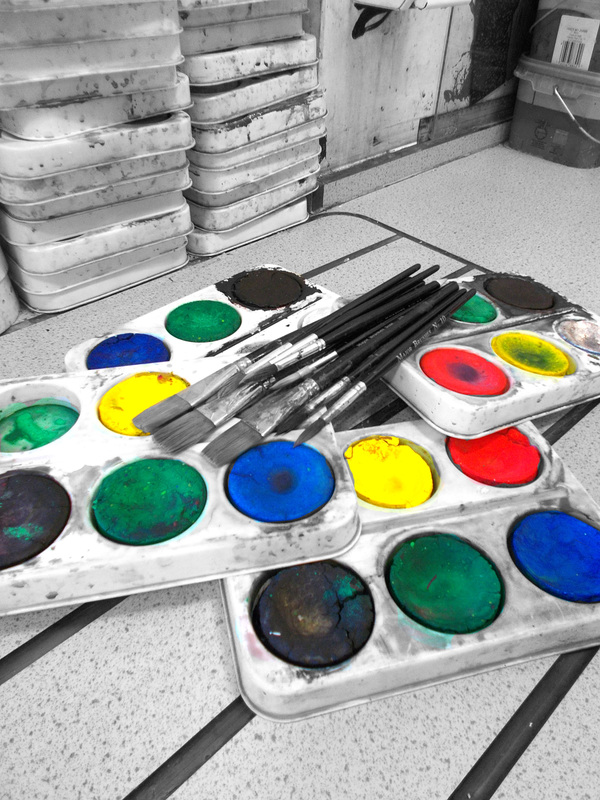
Paints Spot Colour
The image on the right is of a set of paints that are in the art room in my school, West Derby School. I asked the Art Department if I was able to use some of the equipment for my Photography Exam, and they were more than willing to allow me. This image did not take much to make it look the way it looked. I put a Gaussian Blur around the outside to make the main focus on the paints and no distractions from them. I added a contrast to the image so the paints within the image were clear and bright, and I also had to make the image brighter as the lighting on the day I took the image was quite poor. |

|
Brushes BW
The image to the right of this paragraph is yet again some equipment that is used by the Art Department from my school, West Derby School. As I said before, the staff here were happy to let me use the equipment for this project. At first, I didn't think that this image would come out as a pleasing image to the eye, however I think that it has resulted in success. To make this image the way it is, I used Adobe Photoshop to make it black and white, and then after that all I had to do was simply make it slightly brighter, as again the lighting was quite poor during this day. |


|
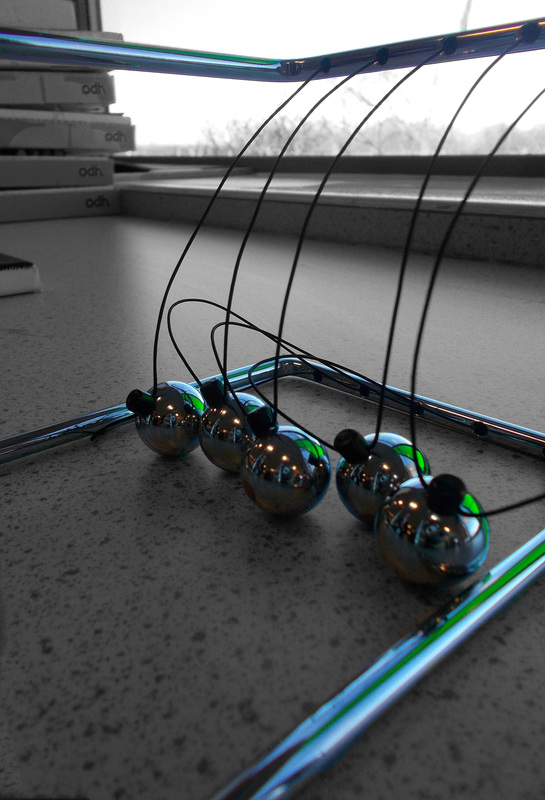
5 Balls
Considering this image was taken on a day were the lighting was really poor, I personally think that I have done a good job of making this image look aesthetically pleasing. I converted the image to black and white, and used the use of spot colour to put the colour of the 5 Balls and the frame of them back in. The good thing is that it really didn’t take me that long; probably around 15 minutes, as I had to make sure I had every significant detail of the balls, and the frame of them, coloured back in carefully and precisely. Ping Pong
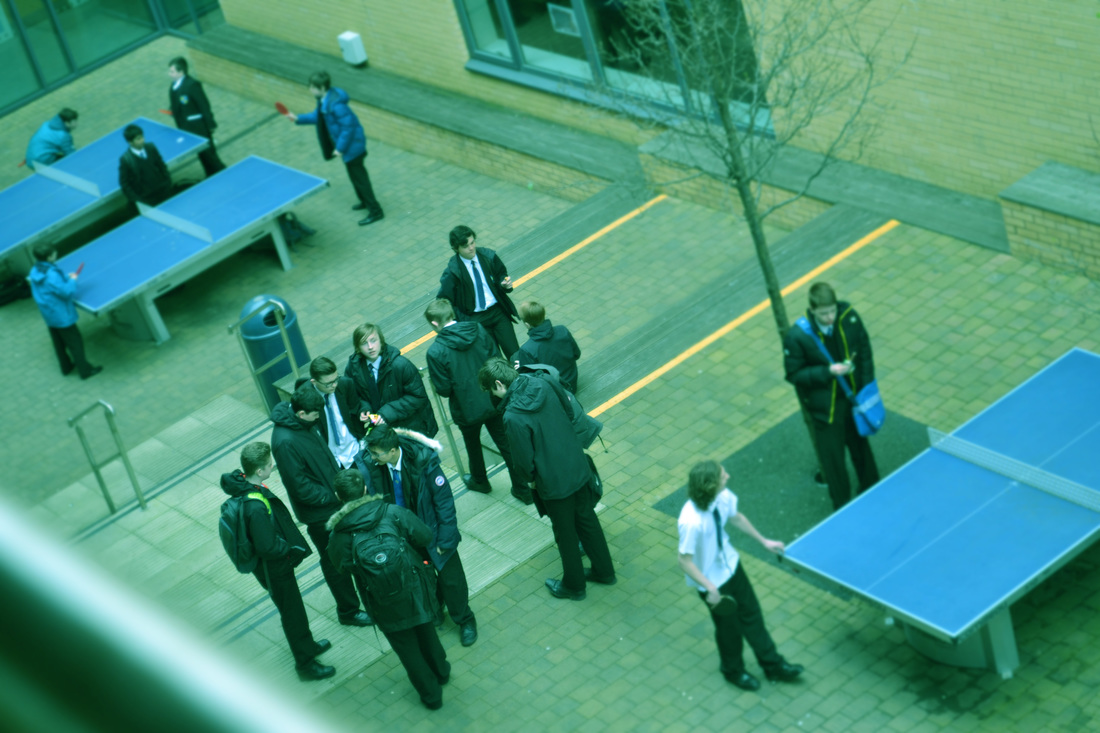
The image that I named, “Ping Pong” is an image which I think is really pleasing to look at. this image took me a lot of time to do, due to the fact that the use of spot colour and attempting to put the table tennis table back in had to be done with precision and accuracy. I had to get in close on the table, and even go around the edges of it to make sure that I had covered the full thing, and not missed any of it out. I then put a slight Gaussian Blur around the outside of the image, so the main focus point wold be the table, and the people around it; a GROUP of people around a table tennis table. the final result of my ideas for the image is a result that I think is sufficient. 3 Shoes
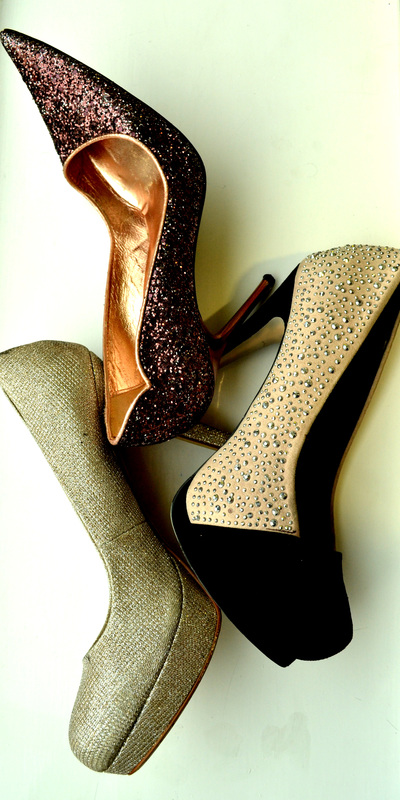
With all things considered, I think that this image has came out as a good final result. The shoes that i used for this were just 3 different shoes belonging to my mum! Of course, she gave me permission to use them for my project. When I had this image open in Adobe Photoshop, I was a little stuck on what to do with this image to make it aesthetically pleasing. I decided to up the contrast in the image, to try and define the colours of the shoes. then, as it was a bit of a rainy day, I used a Gaussian Blur around the outside of the shoes, to try and take any focus points out of the rain on the windows. After doing just these two simple effects, the result of this image has really pleased me, and i hope it pleases you as well! Group of Seats
You may look at this image and think, “How does this photograph relate to GROUP Photography?”. From my perspective, this image links in to the groups category well, as all the way around the Liverpool Wheel, as you can see, are seats; a GROUP of seats. Some people may disagree with how I have interpreted this image, however I think that I have modified and used my thoughts to interpret this image well. I took this image on a blue day, the weather was really nice on this day, however i make the image monochromatic to give the image a subtle mood to it and make it more aesthetically pleasing. I also used the Levels tool in Photoshop, and made it slightly darker to put more emphasis on the mood I am trying to create with this image. |


|
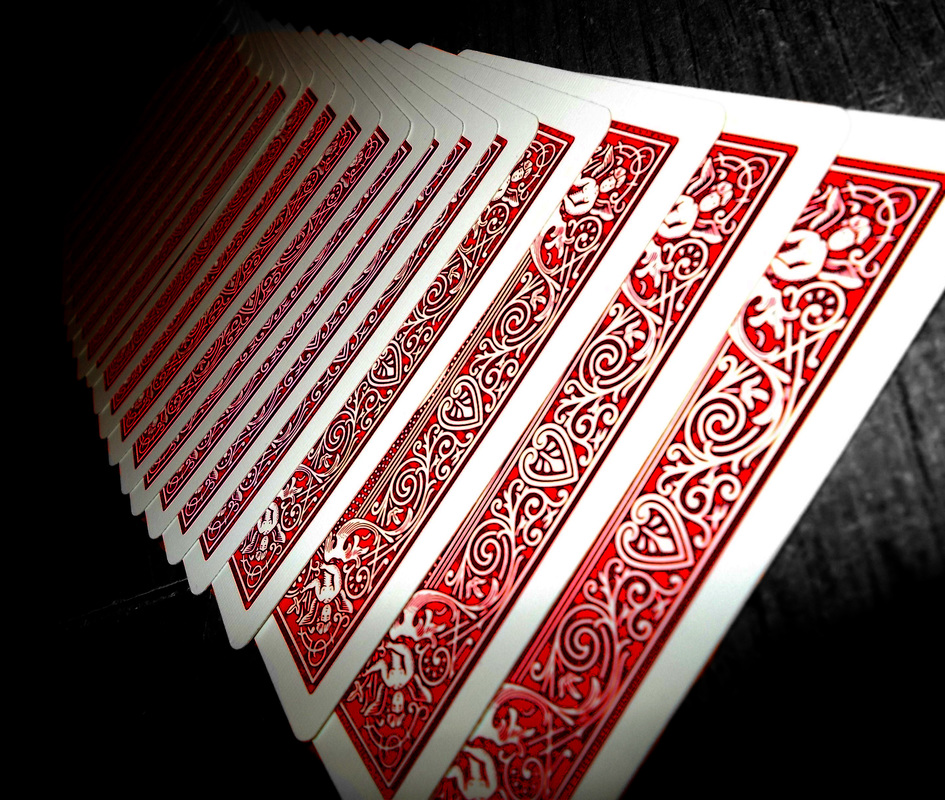
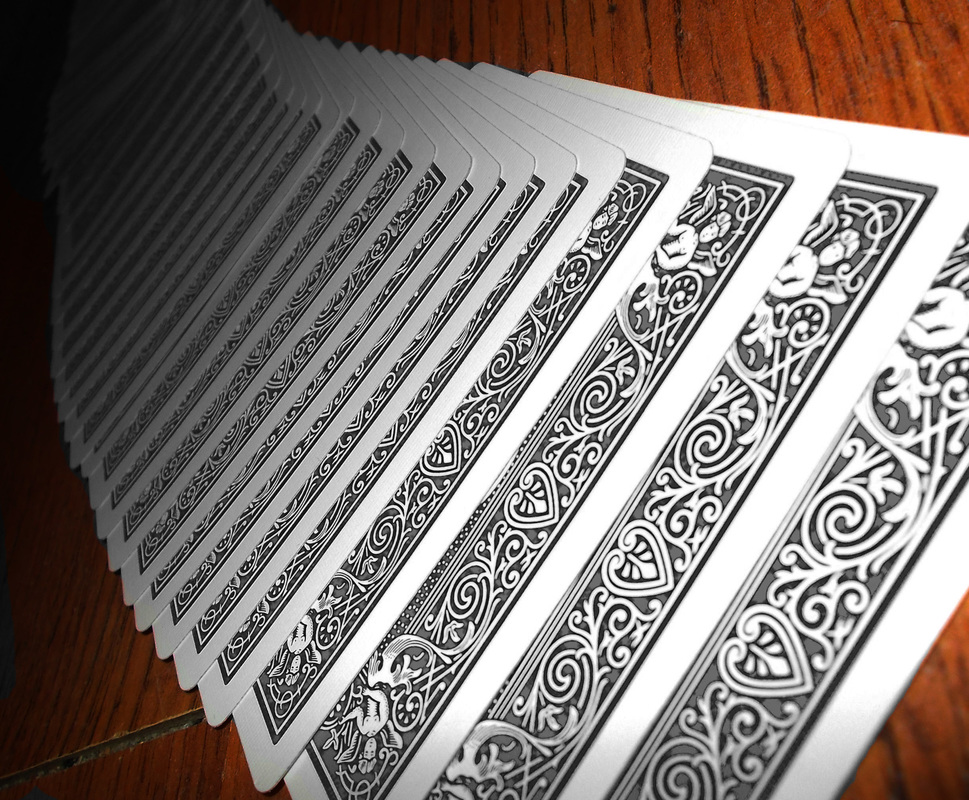
Cards SC
Cards. Such a simple piece of material which can be used so effectively. Most people use these to play card games, to show off their magic tricks, me... I use them to take pictures of them! I think that this image has really came out well. I think that the group category fits in well with a deck of cards as there is a large amount of cards in one deck; 52. As you can see in the image, i have made it monochrome, and then used the paint brush tool to colour back in all of the red cards. I personally think that this adds a good effect to the image, and the black and white contrasting with the red that has been put back in on the diamonds and hearts. After doing this, I used the levels tool and made it slightly darker to give the image more of a subtle mood to it and I think that it has worked out really well. |
How to: Gaussian Blur
Learning how to a Gaussian Blur on an image is pretty straight forward. the tutorial on how to do it below will demonstrate the basic things you need to do in order to get a perfect gaussian blur on an image, and it is something that will eventually get easier with time and practice. It really didn't take me that long to learn how to do it, so it should hopefully be pretty basic and straightforward for you too!
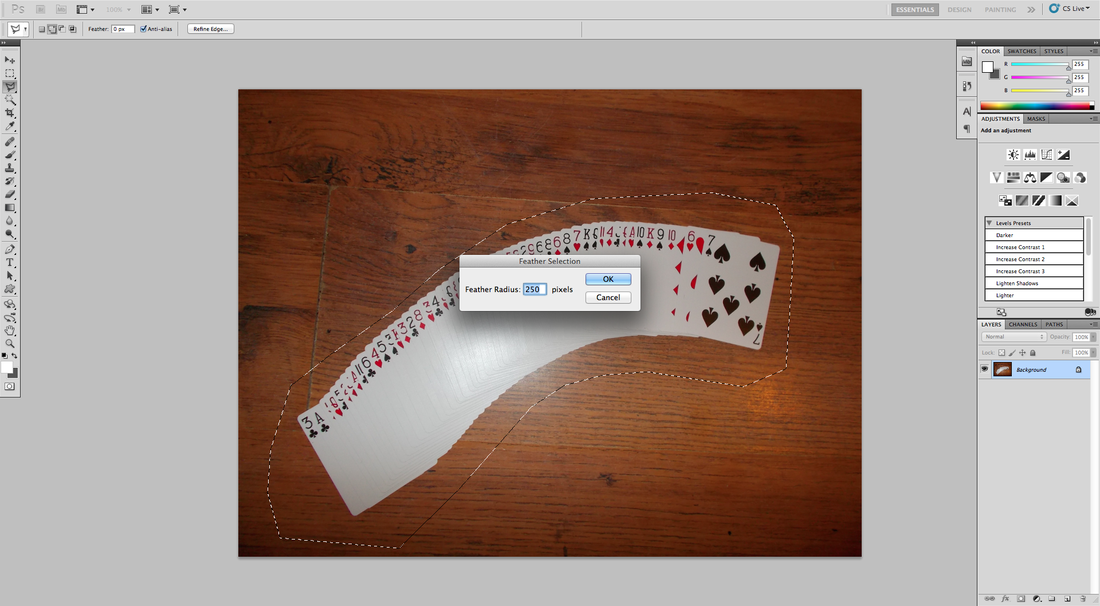
Step 1:
As you can see on the first image, you want to select the polygonal lasso tool which is highlighted on the left. Use this to make a selection around what you want to keep in focus, or what you want to blur. After doing this, you want to press SHIFT & F6, and this will let you feather your selection.
As you can see on the first image, you want to select the polygonal lasso tool which is highlighted on the left. Use this to make a selection around what you want to keep in focus, or what you want to blur. After doing this, you want to press SHIFT & F6, and this will let you feather your selection.
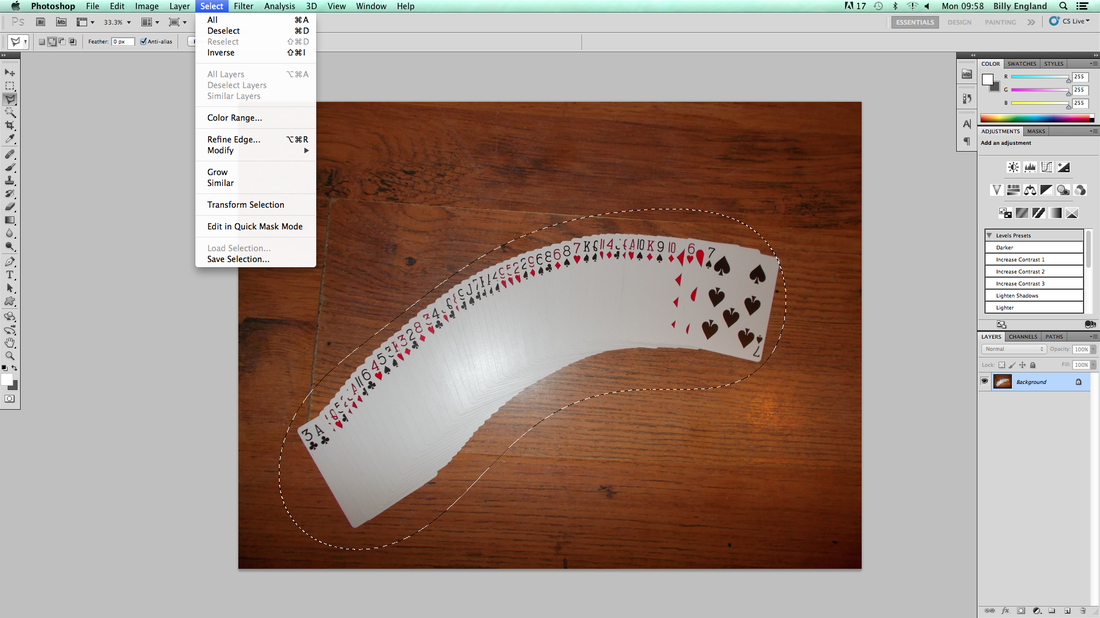
Step 2:
After that, as you can see in the second image, you want to press SELECT & INVERSE. This will make your blur go around the main focal point of the image, so what you have selected is not blurred.
After that, as you can see in the second image, you want to press SELECT & INVERSE. This will make your blur go around the main focal point of the image, so what you have selected is not blurred.
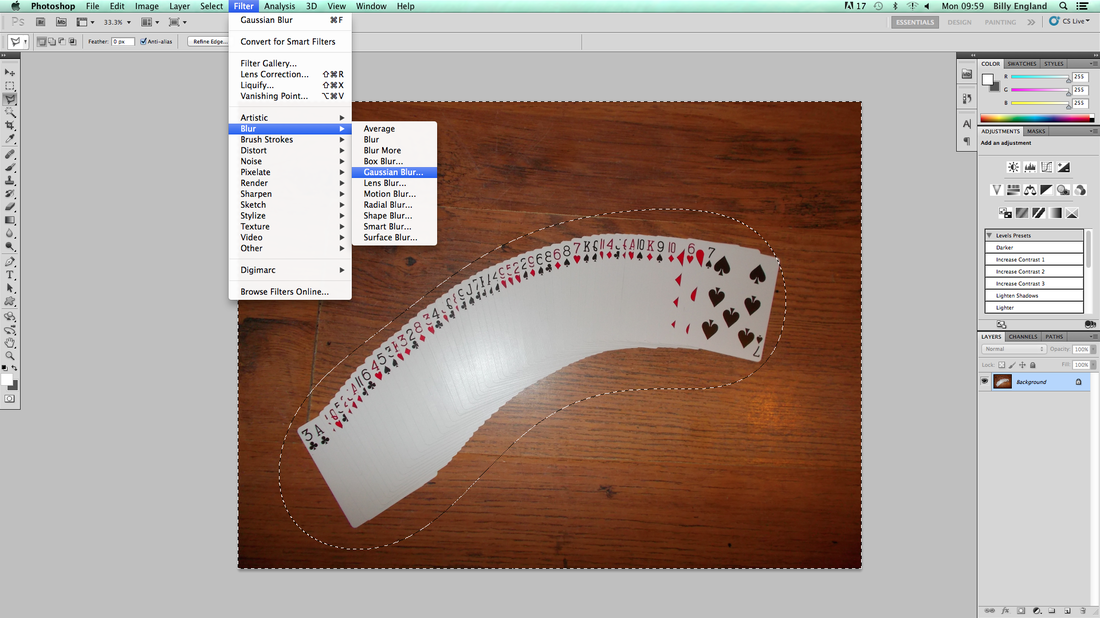
Step 3:
Then, after doing this you want to go to FILTER, BLUR, GAUSSIAN BLUR. This will finally add the blur to the image.
Then, after doing this you want to go to FILTER, BLUR, GAUSSIAN BLUR. This will finally add the blur to the image.
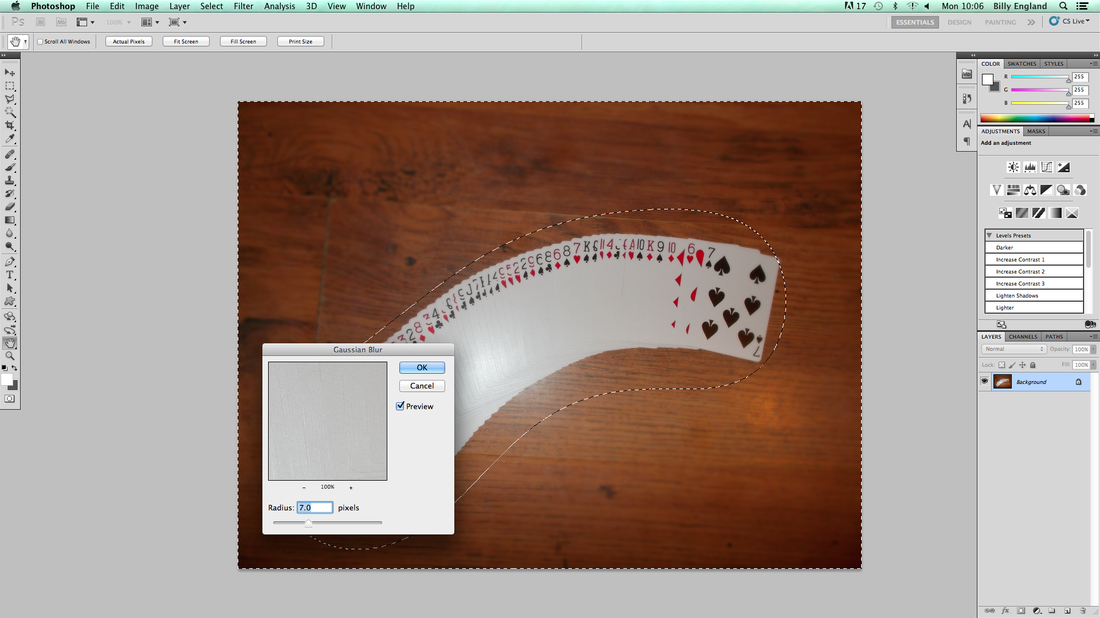
Step 4:
The very last thing you want to do with this is select the radius of pixels you are blurring. This will finally determine how much the image is being blurred out.
The very last thing you want to do with this is select the radius of pixels you are blurring. This will finally determine how much the image is being blurred out.
My Final Presentation